Here at JB&A, we get our hands on a lot of different projects. Some are large, some are small, complex, and even simple. Every now and then one comes around that is too good not to share with the community, so I think it’s time for a case study. Today we are going to take a look at an esports solution for Iowa Valley Community College that won’t break the bank. This project specifically interested me because… well, I am kind of cheap, and I am all about esports! We have gear from multiple different manufacturers on this project; Kiloview, BirdDog, HuddleCam, and JVC are all present. This is a big bill of materials so…
Let's dive right in.
If you attended our pre-NAB show (which if you didn’t, you totally should have), you saw that we had a full esports production workflow as our main event. This workflow was very large, complicated, and super cool. Unfortunately, for a lot of organizations, a setup that large is beyond their budget. Most schools would love an esports production facility but can’t exactly afford a giant LED wall. So, how do we bring some costs down to be more attainable? That was the basic idea for this project. Pretty much every component is brought down to necessities, and that isn’t a bad thing. This is still very much a fully functional workflow with no major pieces missing.
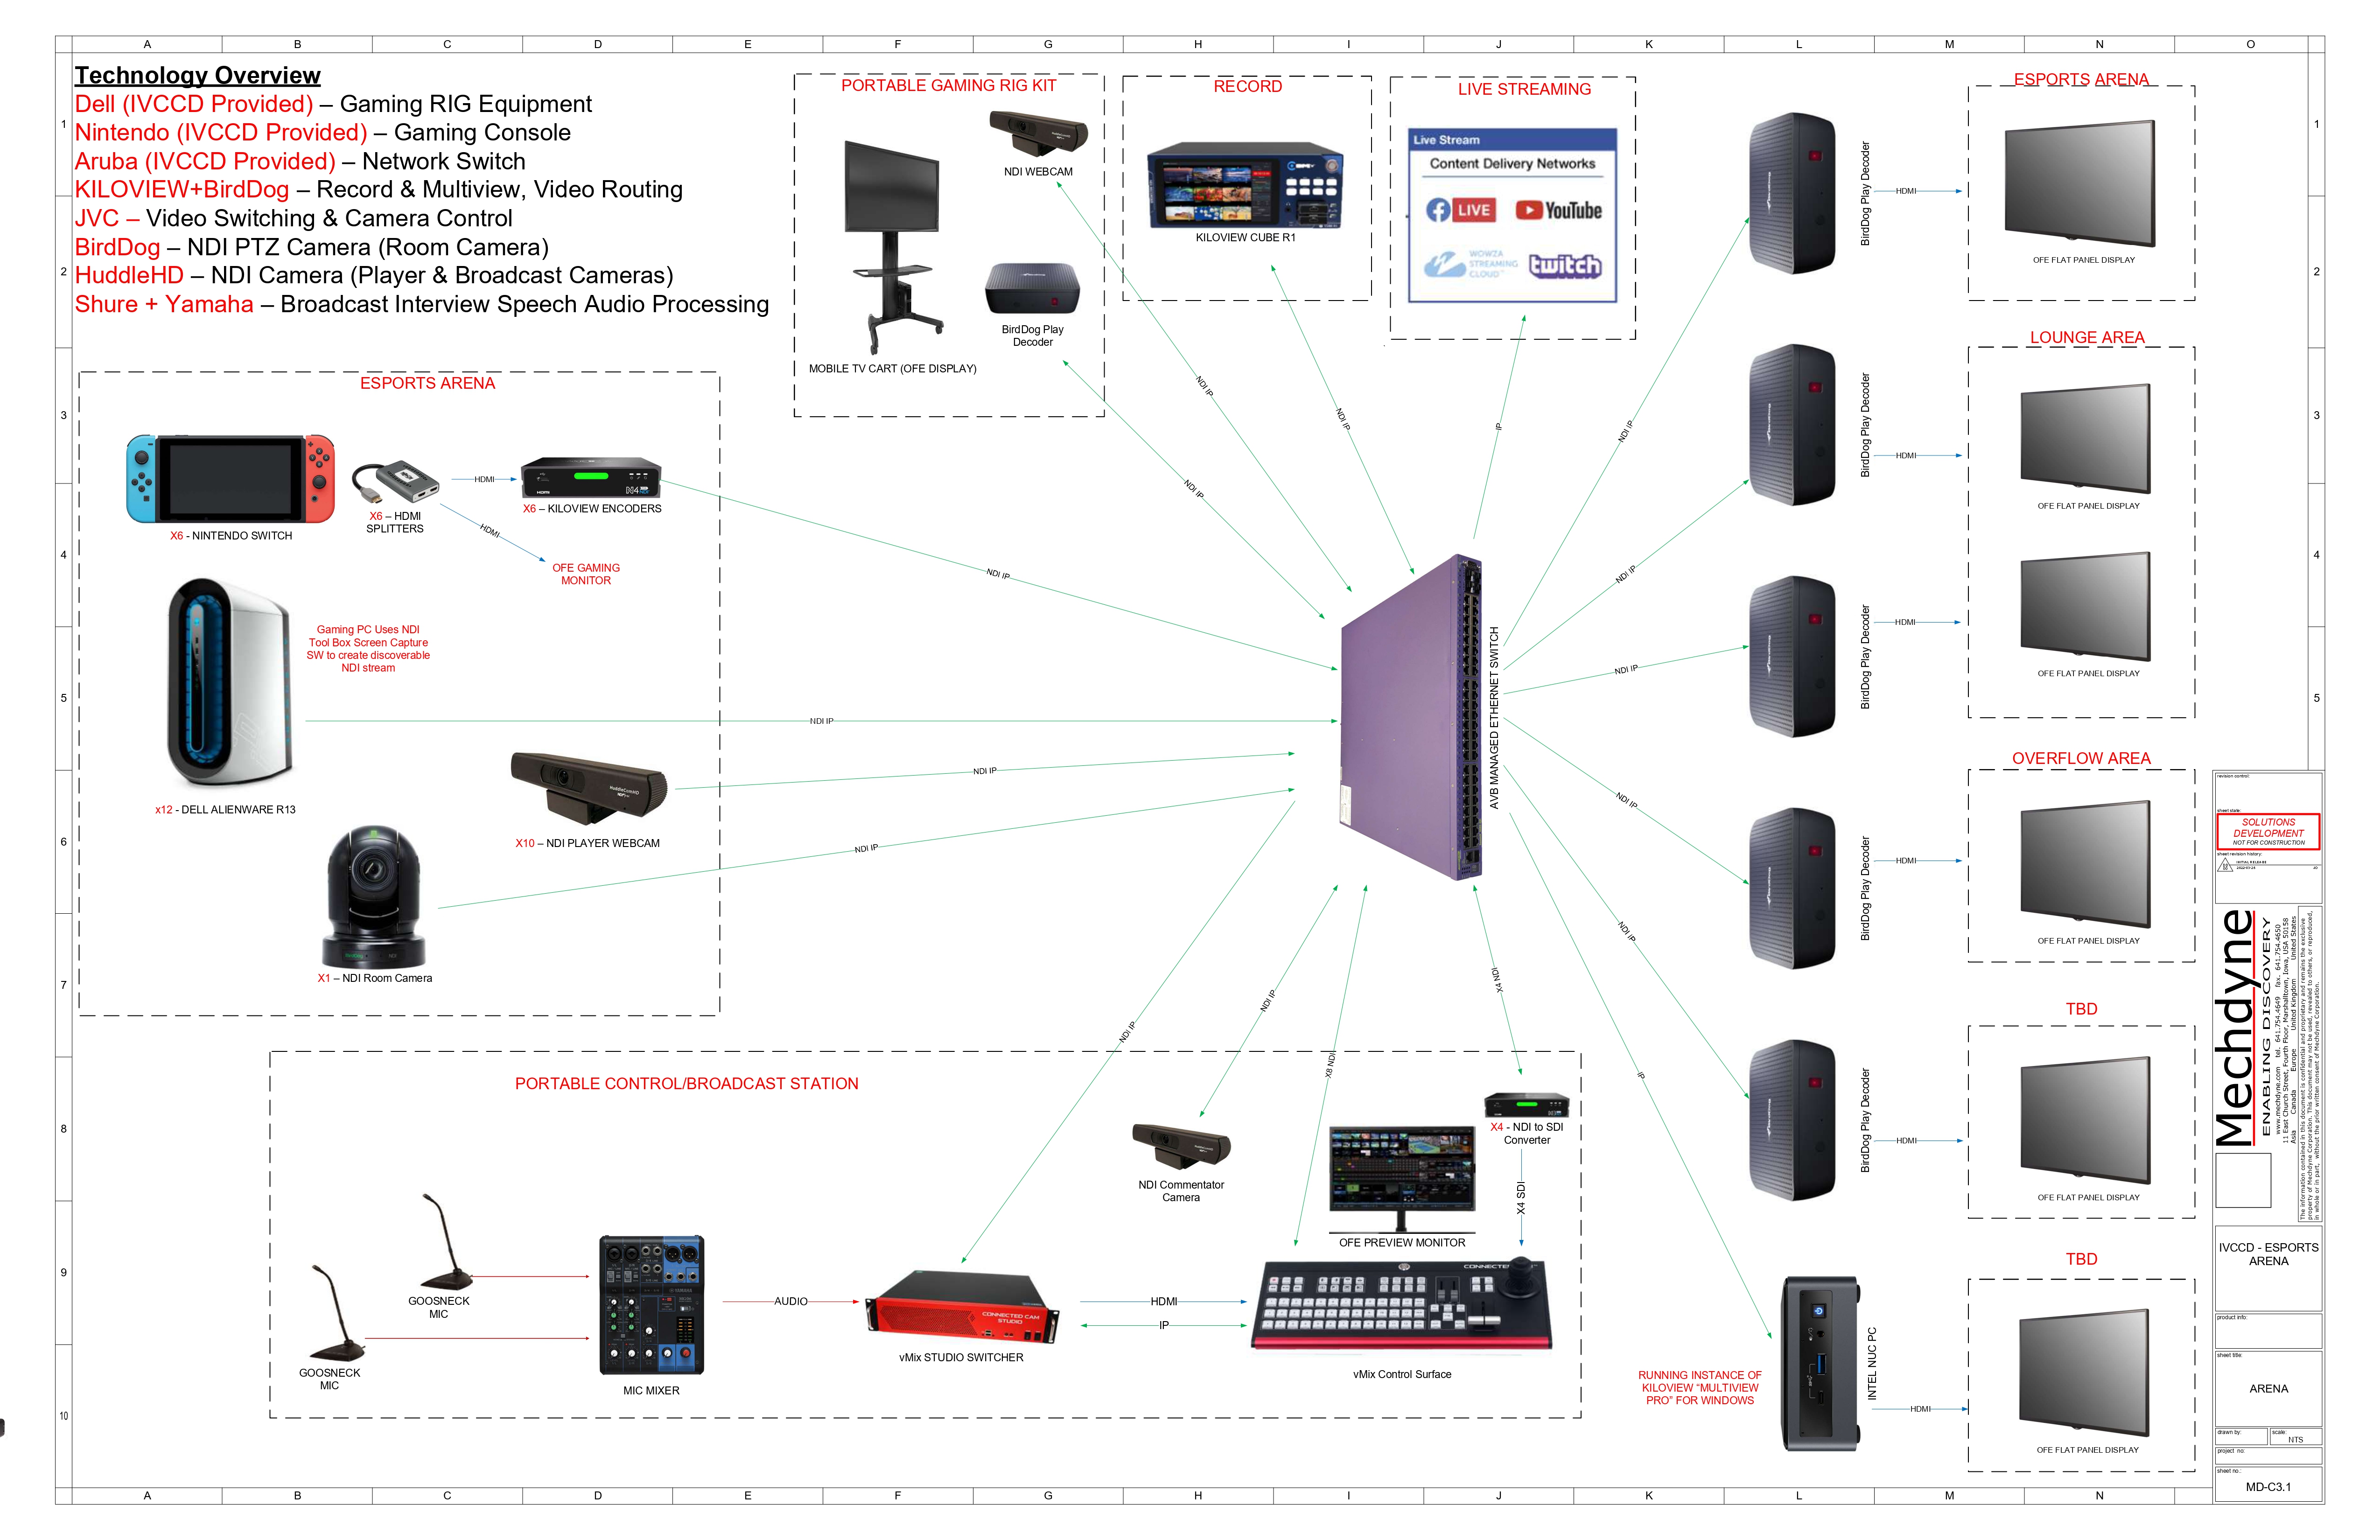
Let’s start where the action happens, and that’s the games. You’ll notice on the right side of the graphic below that the school wanted to record Nintendo switches and PCs. The computers are easy to encode NDI on the cheap since they can use NDI screen capture, but the consoles need an encoder, for which we chose Kiloview. To record the gamers beautiful faces, we have one BirdDog P200 to record the wide shot and HuddleCamHD 4K NDI EPTZ webcams for the close-ups. All these cameras provide good quality at a low cost and still give us the expected camera shots we would want. Having webcams with NDI is a huge plus, as we can get all of our inputs onto the network for easy access and control.
Next, we’ll take a look at the bottom section to review the production side. You’ll notice some microphones and a mixer on the far left. That’s because the gamers aren’t the only ones that need to be recorded. No esports show is complete without some commentators, and adding mics with an audio interface or mixer is easy to do, even on a low budget. The mixer goes directly into the JVC Vmix Connected Cam Studio Switcher because the hardware is Windows-based and can accept USB audio. Now, if you’re a clever fella, you’ve noticed we have way too many inputs for the Connected Cam switcher to take in at once. You are correct, but in this situation, the school only needs to use a few inputs at once as their typical workflow would be a 2v2 game. By using some Kiloview converters and the switch’s 4 SDI inputs, they could run up to 12 sources if needed. For a small workflow, this is more than doable. But it is not uncommon for esports production systems to require many more inputs, so this would likely be one of the first areas to upgrade if you wanted to try a larger version of this setup.
Moving to the right side of the graphic you’ll notice a bunch of displays, an Intel PC, and BirdDog Play decoders. This is one of the big advantages of having an NDI workflow for your production. By using multicast, we can take an output from the production switcher and send it to multiple displays in the facility. We can even have some fancy multiview action thanks to the PC. If we wanted to remove some of the load on the switcher, we could pull up the livestream video on the PC and use Screen Capture to send that to the decoders. There is a lot of flexibility and ways to run this setup with minimal physical moving of things around.
The last sections at the top are pretty self-explanatory but still great ideas. There’s the Kiloview R1 for recording up to 9 channels of NDI sources, yet another way to take a load off of the production switcher. Most production switchers can do a lot of functions, but it’s never a bad idea to have dedicated hardware for tasks. There is a portable gaming rig to move the action around, and the multiple services we can live stream at. That’s pretty much the whole system in a nutshell. There are a lot of areas where this can be upgraded over time, but this is plenty good enough to get started with. I think the star of this show must be the JVC Vmix Connected Cam Studio Switcher. This switcher is considerably less expensive than other NDI switchers on the market, and it allowed the users to upgrade from OBS to gain a lot more functionality.
This project was a great example of how we work with resellers to craft the perfect solution for your needs and budget. We honestly need to do case studies a lot more, but this one was especially cool to me, so I had to share it. If there’s anything specific you want to see in the future let us know in the comments below or email us at [email protected].
All the best, Silas aka SighFye


